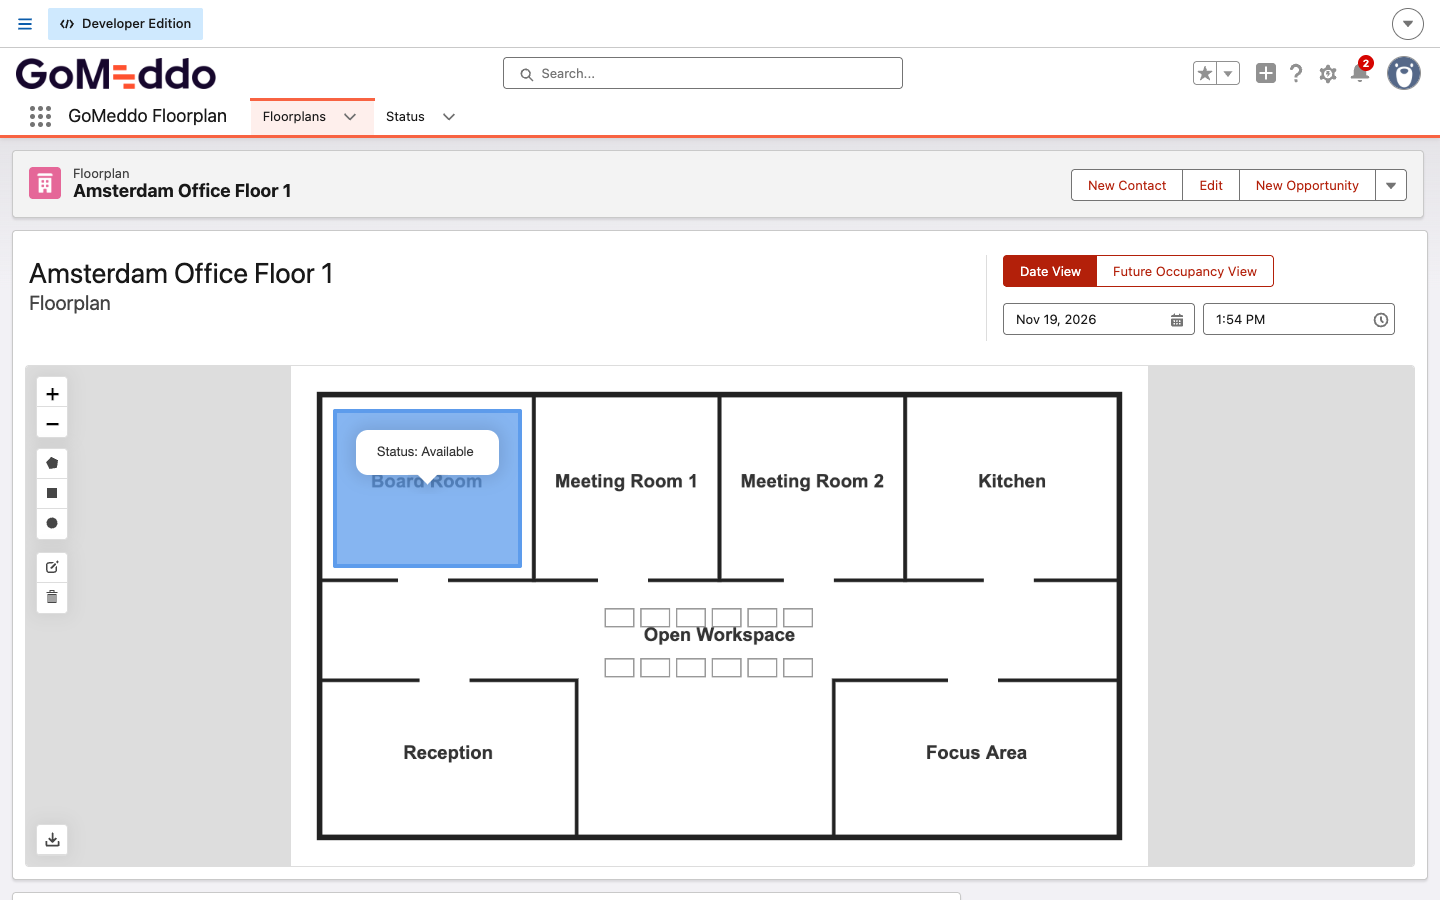
A floorplan shows your rooms and spaces on a map. This guide shows how to create a floorplan record, add the floorplan image, and draw the areas on it.
Create the floorplan record
-
Open the App Launcher and select GoMeddo Floorplan.
-
Click the Floorplans tab.
-
Click New.
-
Enter a Floorplan Name and click Save.
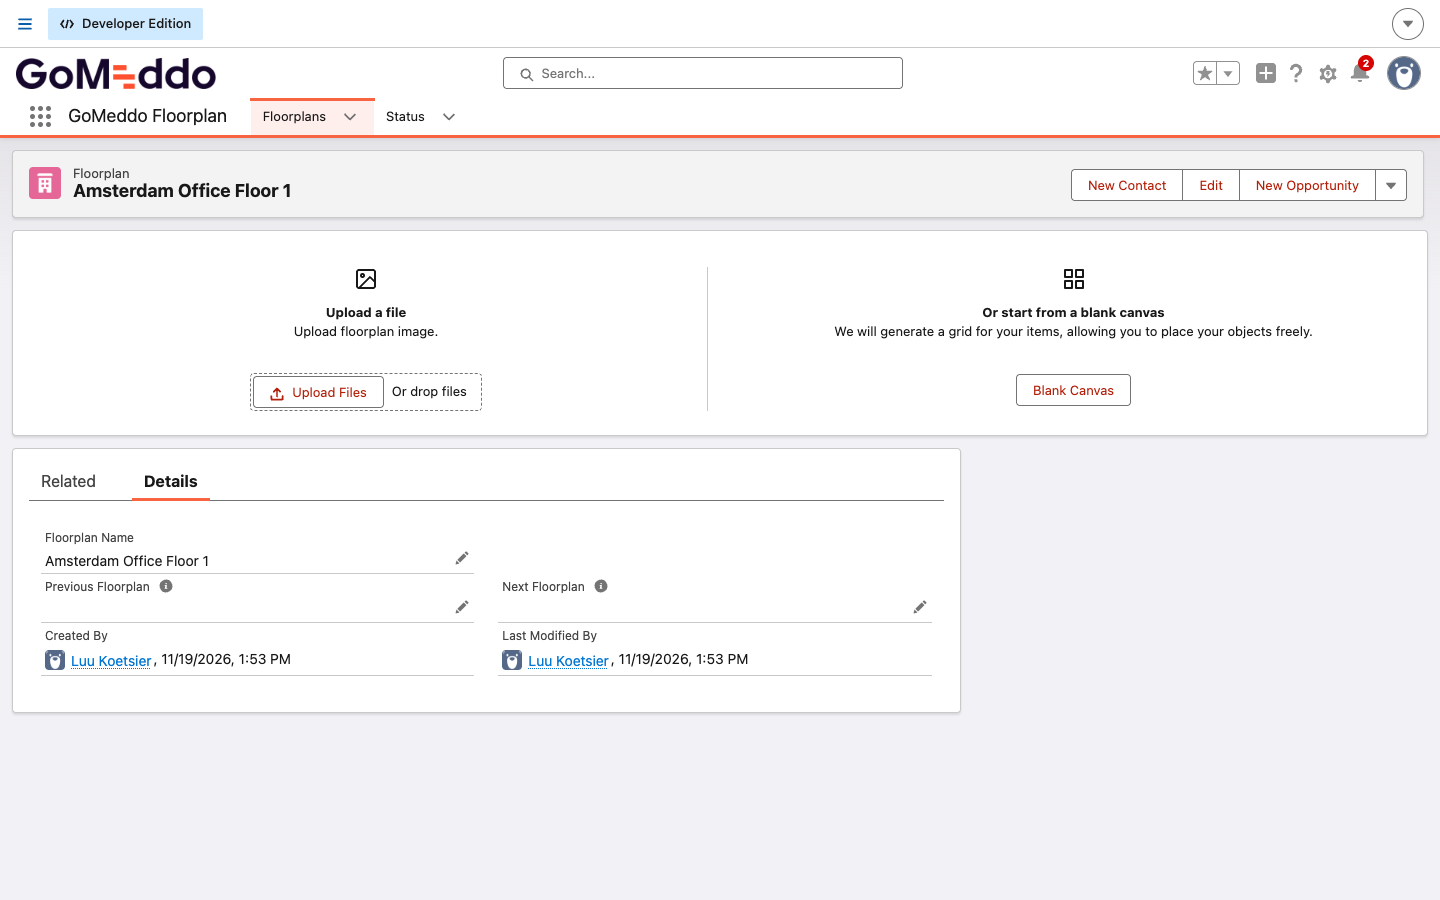
The floorplan record opens with two options: Upload a file and Or start from a blank canvas.
Add the floorplan image
-
Click Upload Files, or drop the image file on it.
-
Select the image of your floor. You can use a JPG, PNG, GIF, WEBP, BMP, or TIFF file.
-
When the upload is complete, click Done.
The image now appears as the floorplan, with the drawing tools on the left.
Don't have an image? Click Blank Canvas instead. GoMeddo generates a grid on which you place your areas freely.
Draw the areas
-
Click one of the drawing tools on the left: Draw a polygon, Draw a rectangle, or Draw a circle.
-
Draw the area on the floorplan.
The area appears on the floorplan with its status, for example Status: Available. To change the shape of an area, click Edit layers below the drawing tools, drag the handles of the area, and click Save. To remove an area, click Delete layers, click the area, and click Save.