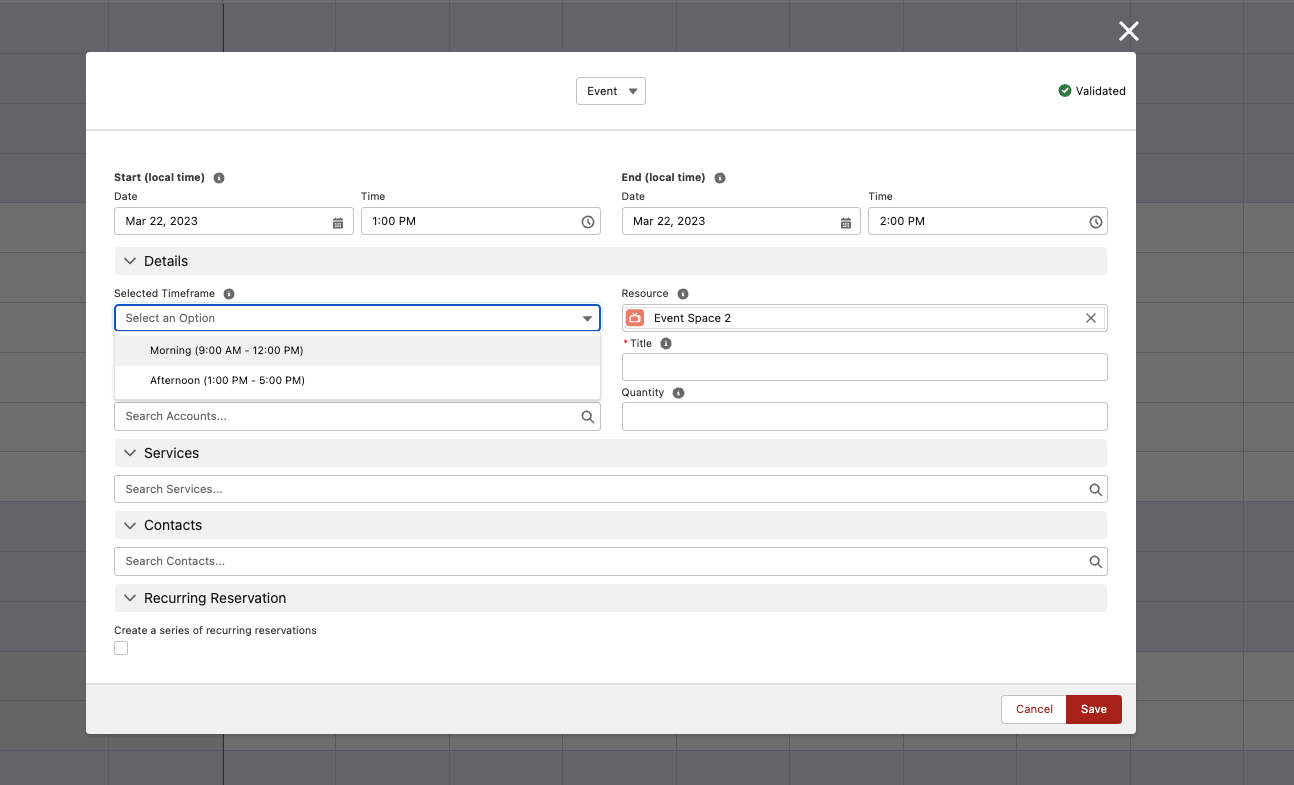
Predefined timeframes allow you to show your calendar users a dropdown with preconfigured time ranges. This lets them quickly select a combination of start and end times.
Steps
-
Go to the ‘Predefined timeframes’ tab, and click New.
-
Fill in at least the required fields: Label, Start Time and End Time. The dates are irrelevant, we only look at the times you fill in here.
*The Start Time and End Time should not be the same as another timeframe!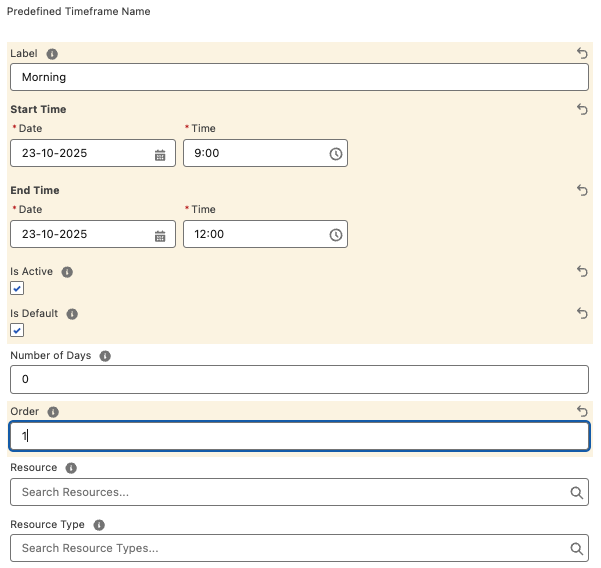
-
(Recommended) To make the timeframe available for users on the calendar, check the Is Active checkbox.
-
(Recommended) If you have multiple timeframes, check the Is Default field on one of them to automatically select this timeframe for new Reservations created on the calendar.
-
(Optional) You can fill in the Number of Days to have a timeframe span multiple days. This allows you to set an End Time that is earlier than the Start Time, which is useful for hospitality accommodations.
-
(Optional) You can use either or both of the Resource and Resource Type fields to restrict a timeframe to a specific Resource and/or Resource Type. The example below would only appear for Resources of type Room that are located in the city of Amsterdam.
