When you have performed the actions in the Set up Zoom App step, you need to authenticate the Zoom App you just created from Salesforce, it requires you to perform a few easy steps to authenticate.
1. Auth provider
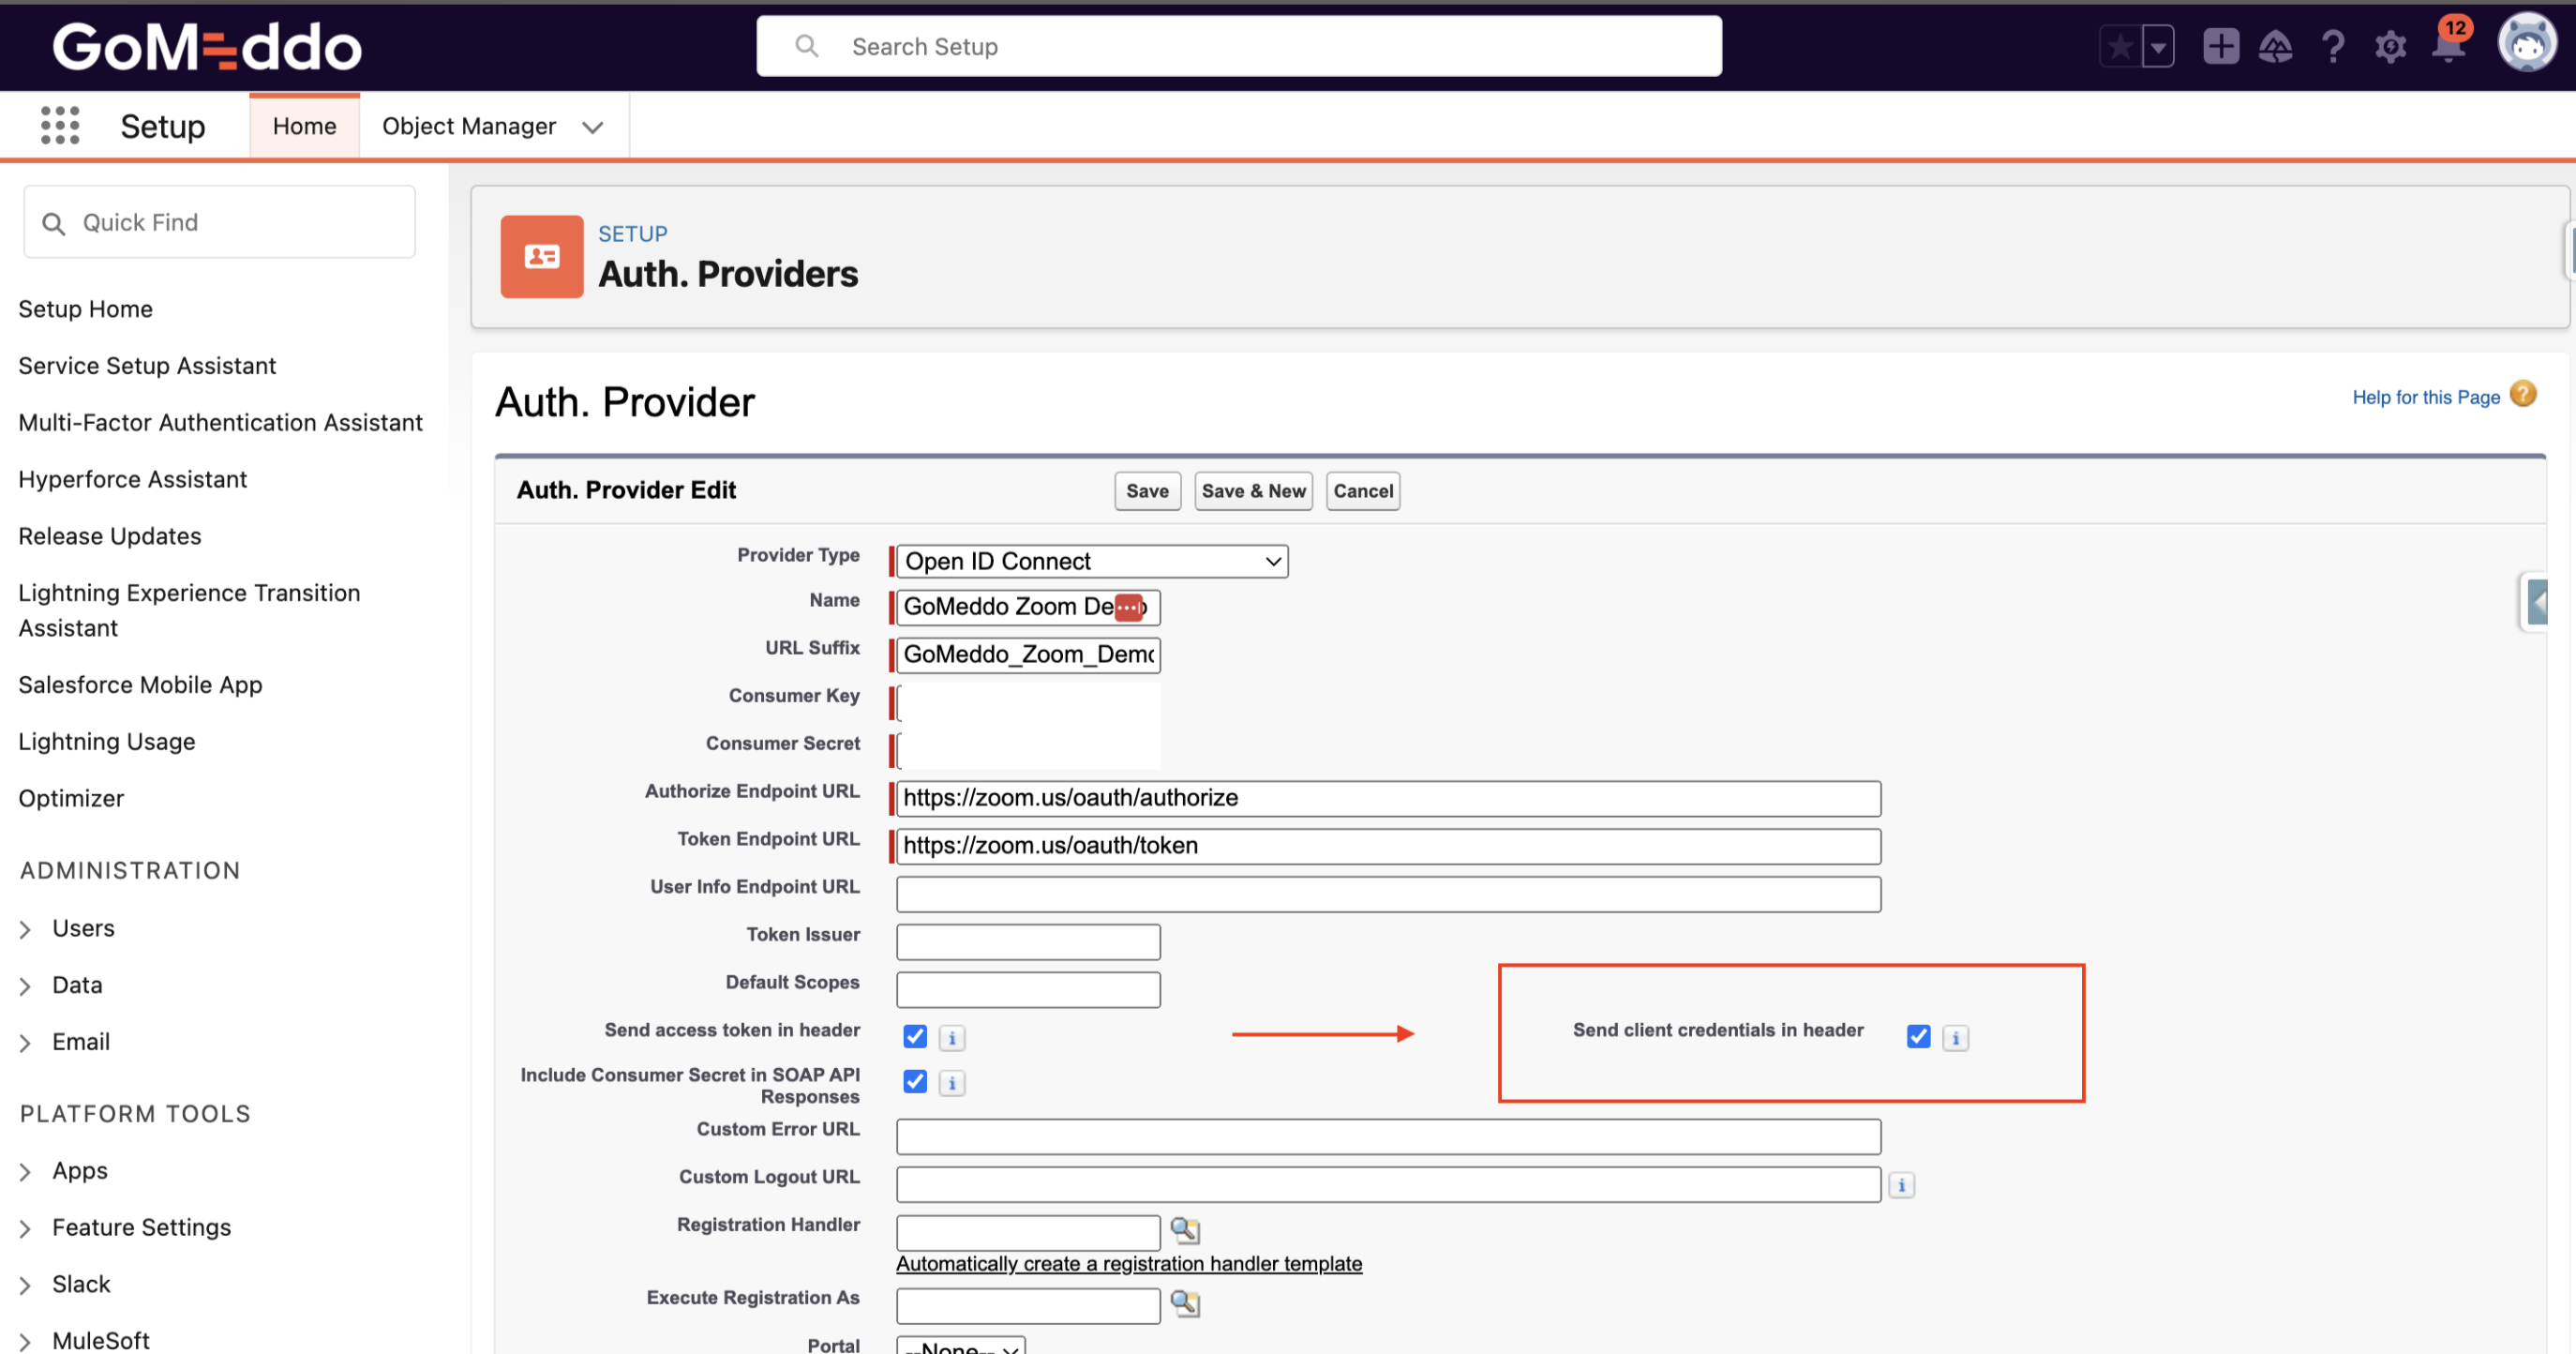
To set up an Auth. provider in Salesforce, follow these steps:
-
Go to Salesforce
-
Go to Setup > Auth. Providers
-
Add a new provider and choose "Open ID Connect" as the type.
-
Go back to Zoom > Basic Information > App Credentials section and copy the Client ID and Client Secret for the next step
-
Give the record a name and enter the Client ID copied from the Zoom app into the Consumer Key field.
-
Add the Client Secret to the Consumer Secret field.
-
Use the following URL for the authenticate URL:
https://zoom.us/oauth/authorize -
Use the following URL for the token URL:
https://zoom.us/oauth/token -
Ensure that "Send client credentials in header" is checked.
-
Save the record.
-
In the Salesforce Configuration section of the Auth. Provider, copy the value of Callback URL
-
this will be something like
https://your-domain.my.salesforce.com/services/authcallback/YourAuthProviderName
-
-
Go back to Zoom > Basic Information > OAuth Information and add the copied value to the OAuth Redirect URL input; this will also add it to the OAuth Allow Lists automatically.
2. External Credential
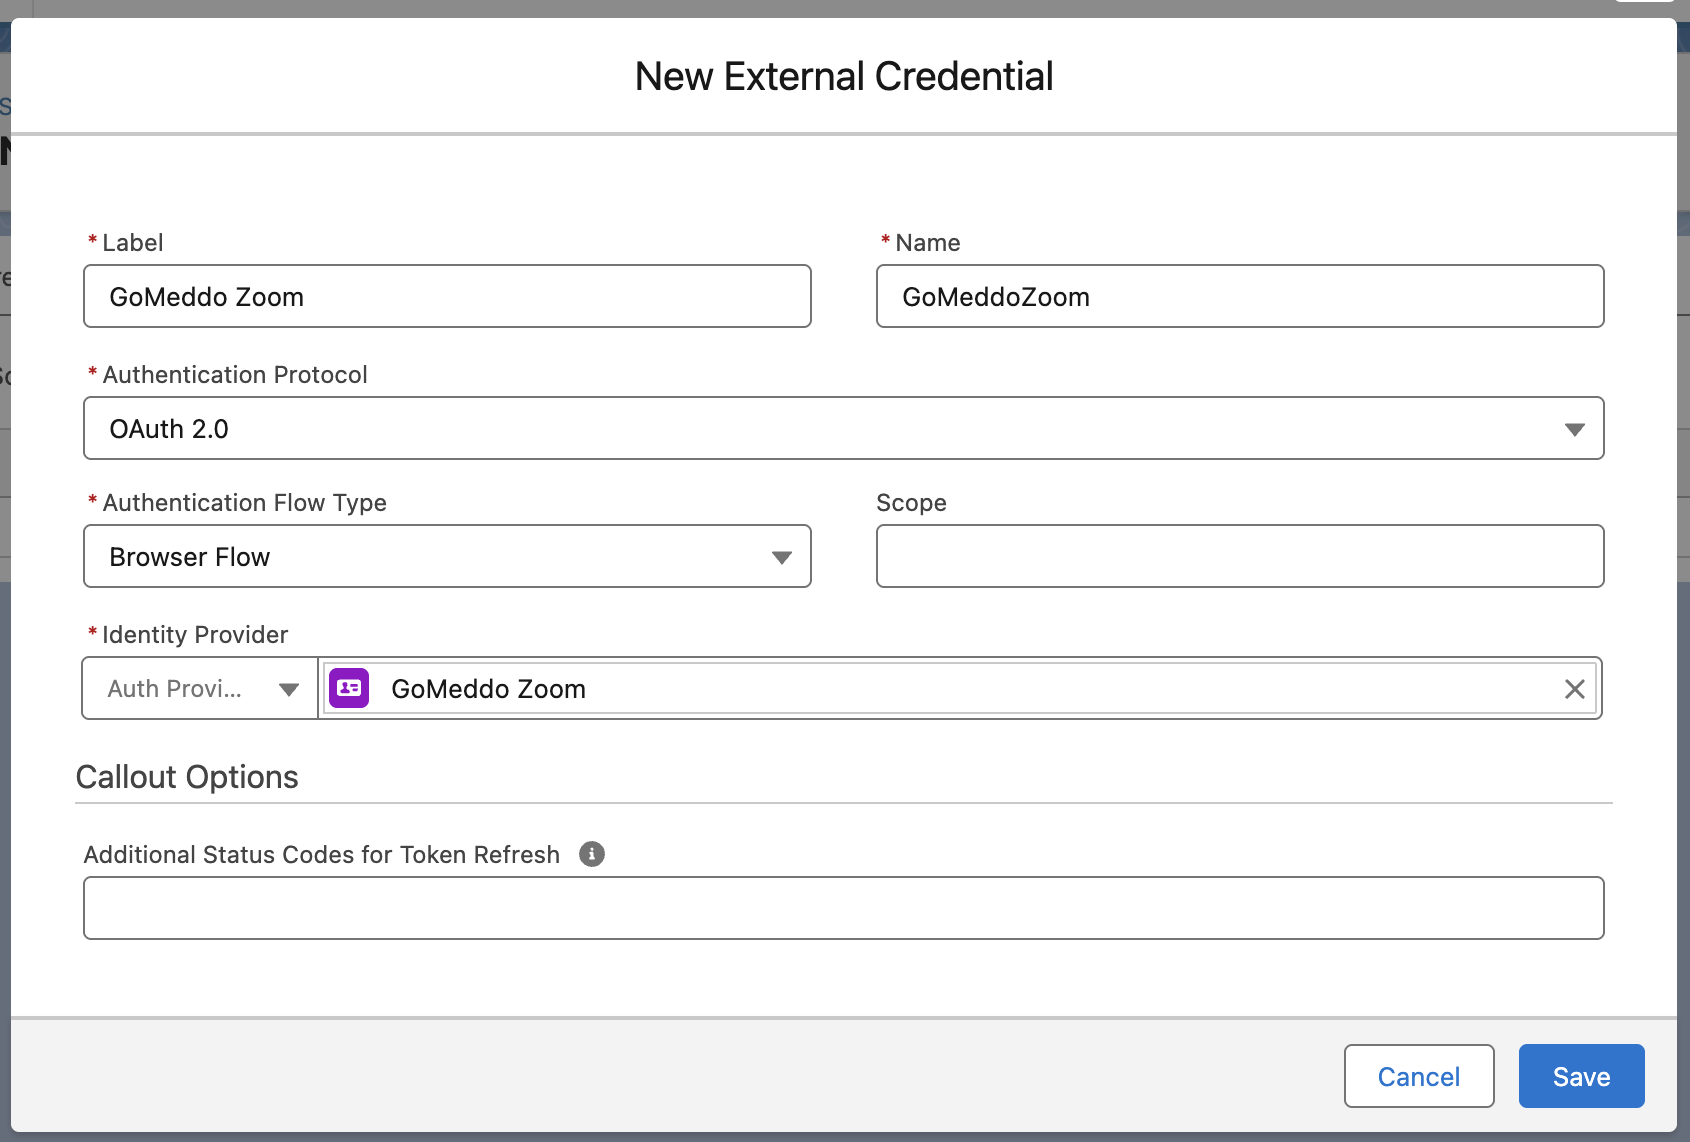
-
Go to Setup > Named credentials
-
Navigate to the External Credentials tab
-
Give it a recognisable name and label, and choose OAuth 2.0 as the protocol
-
Choose the Authentication Provider from the previous step
-
Save
-
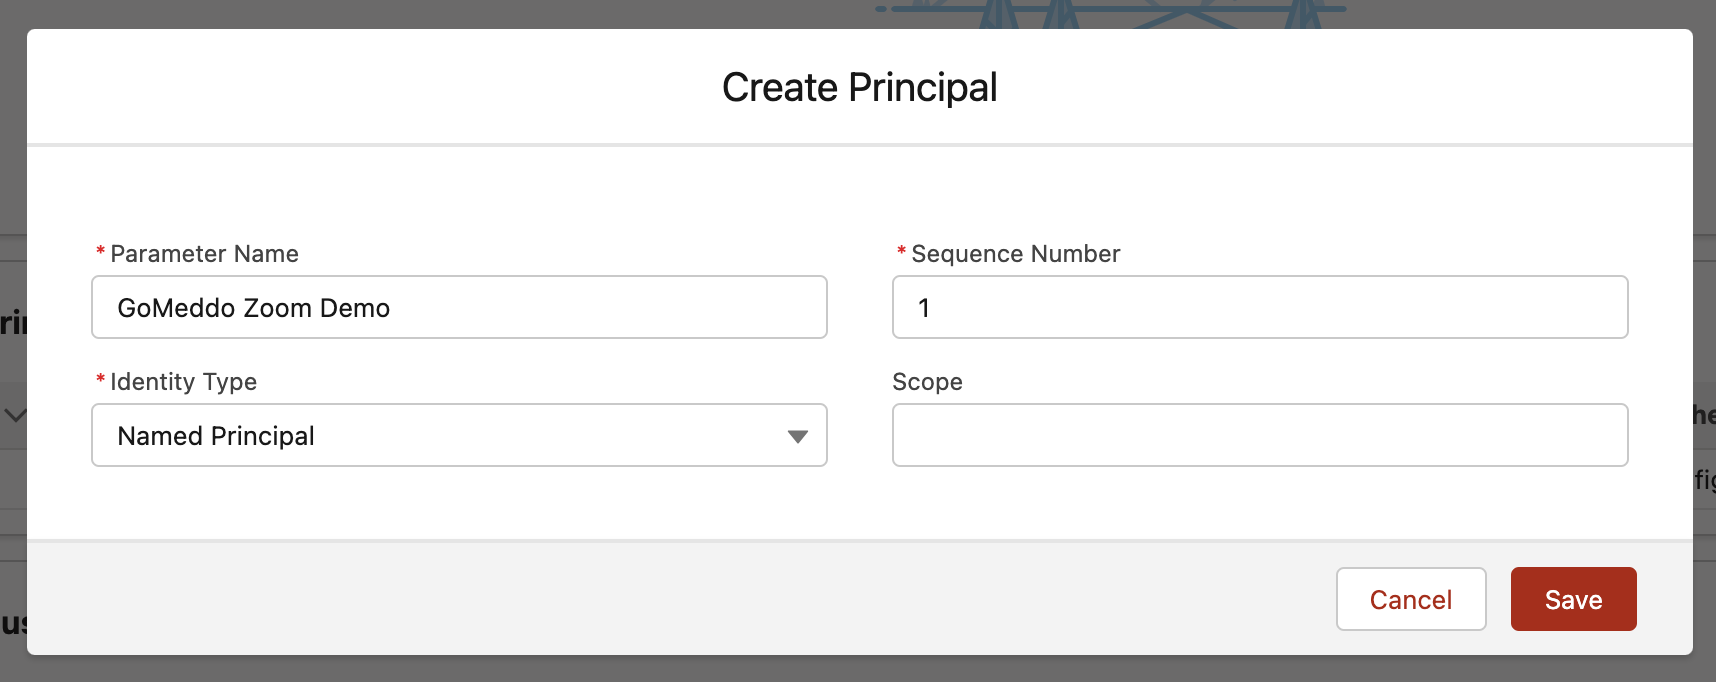
Scroll down to Principals list
-
Click New
-
Fill in a Parameter Name
-
Leave the Sequence Number as-is
-
Make sure the Identity Type is set to Named Principal
-
Click save
-
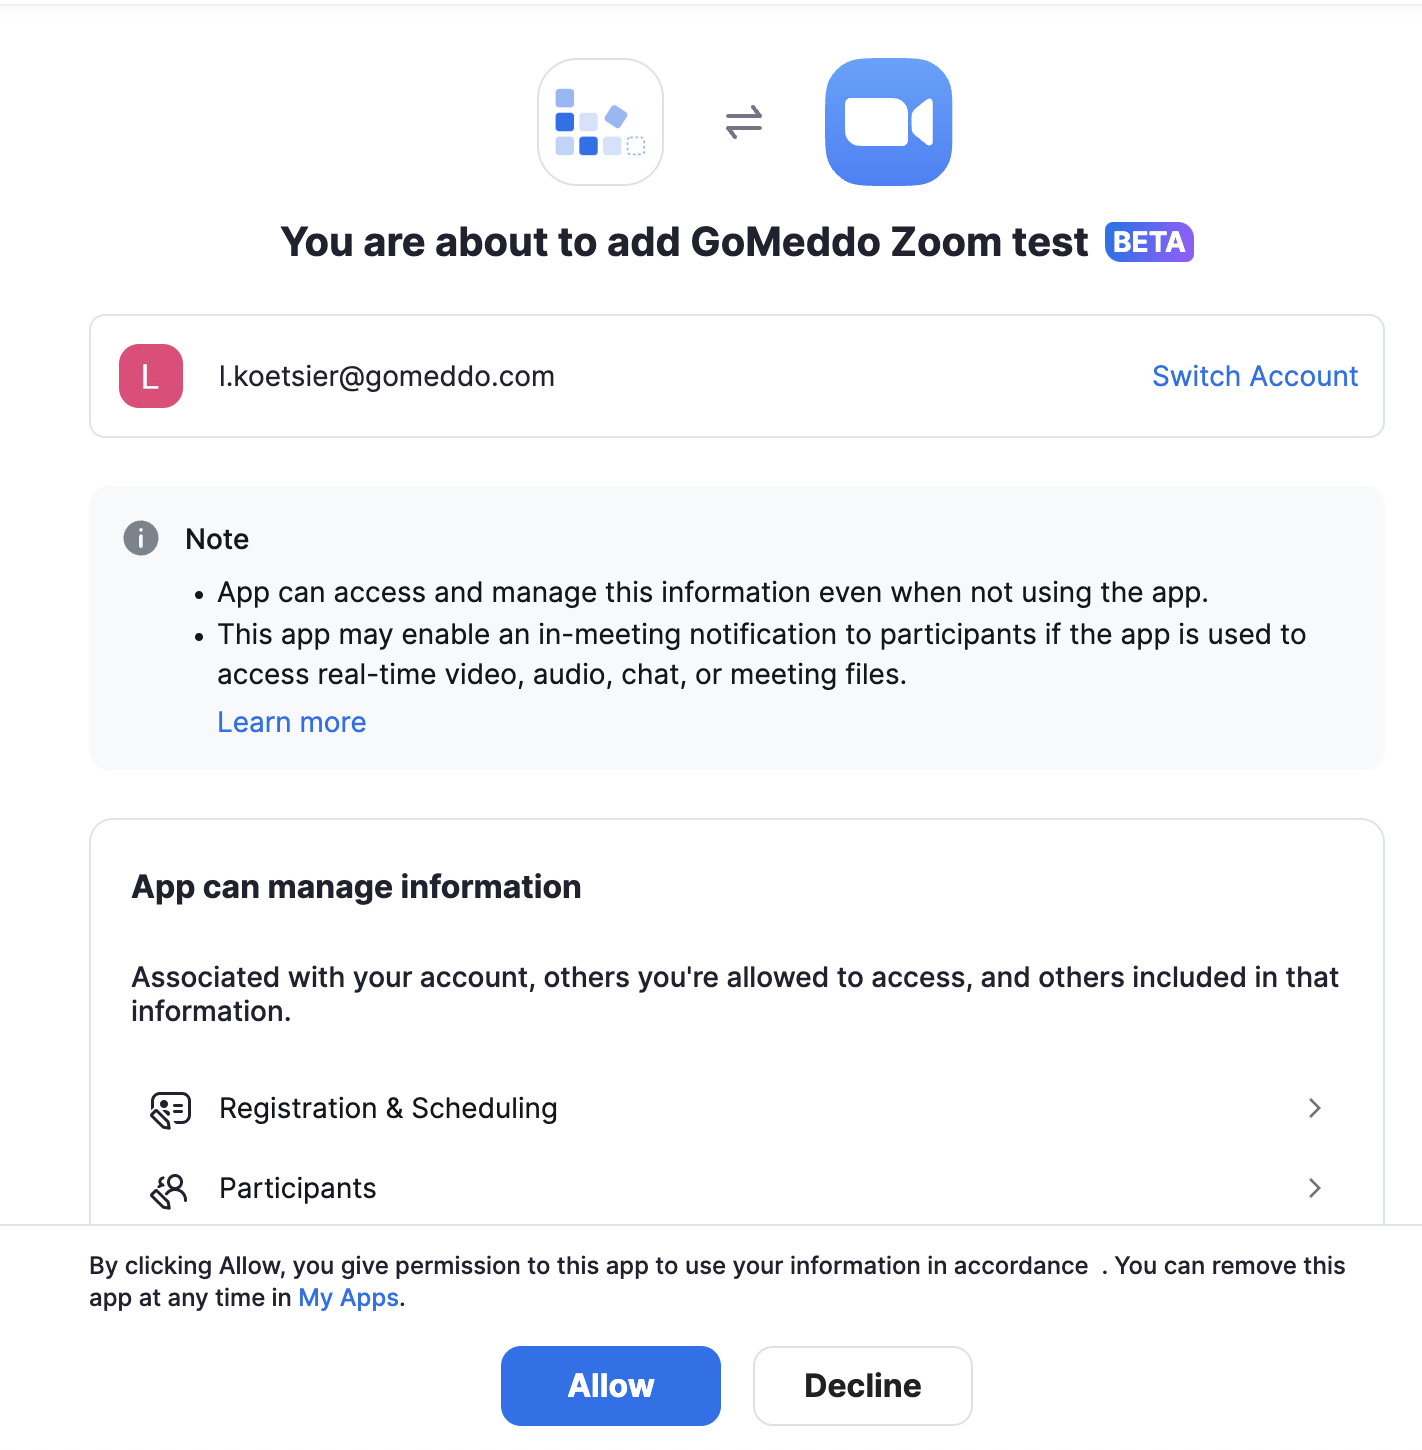
Scroll down to the Principals list again. Click on the down arrow under Actions and press Authenticate:

-
Press Allow
-
Then Salesforce will inform you that it was successful.

3. Named Credential
-
Go to Setup > Named Credentials
-
Click New under Named Credentials (not External Credentials this time)
-
Add a Label and add GoMeddoZoom as name.
-
Add https://api.zoom.us/v2 to the URL field
-
Add the External Credentials "GoMeddo Zoom" and include "GMZoom" as the Allowed Namespaces.
-
Click Save

4. Map Principal to Permission Set
-
Go to Setup > Permission Sets
-
Select an existing Permission Set, or create a new one. This Permission Set will make sure that Reservations created by users contain a Zoom link.
-
Within the Permission Set, go to External Credential Principal Access
-
Click Edit
-
Select the Principal from the previous step in the left column, and add it to the right column
-
Click Save
Make sure to assign this Permission Set to any user that should generate Zoom links for Reservations they create!
Now proceed to section Set the meeting url using a flow