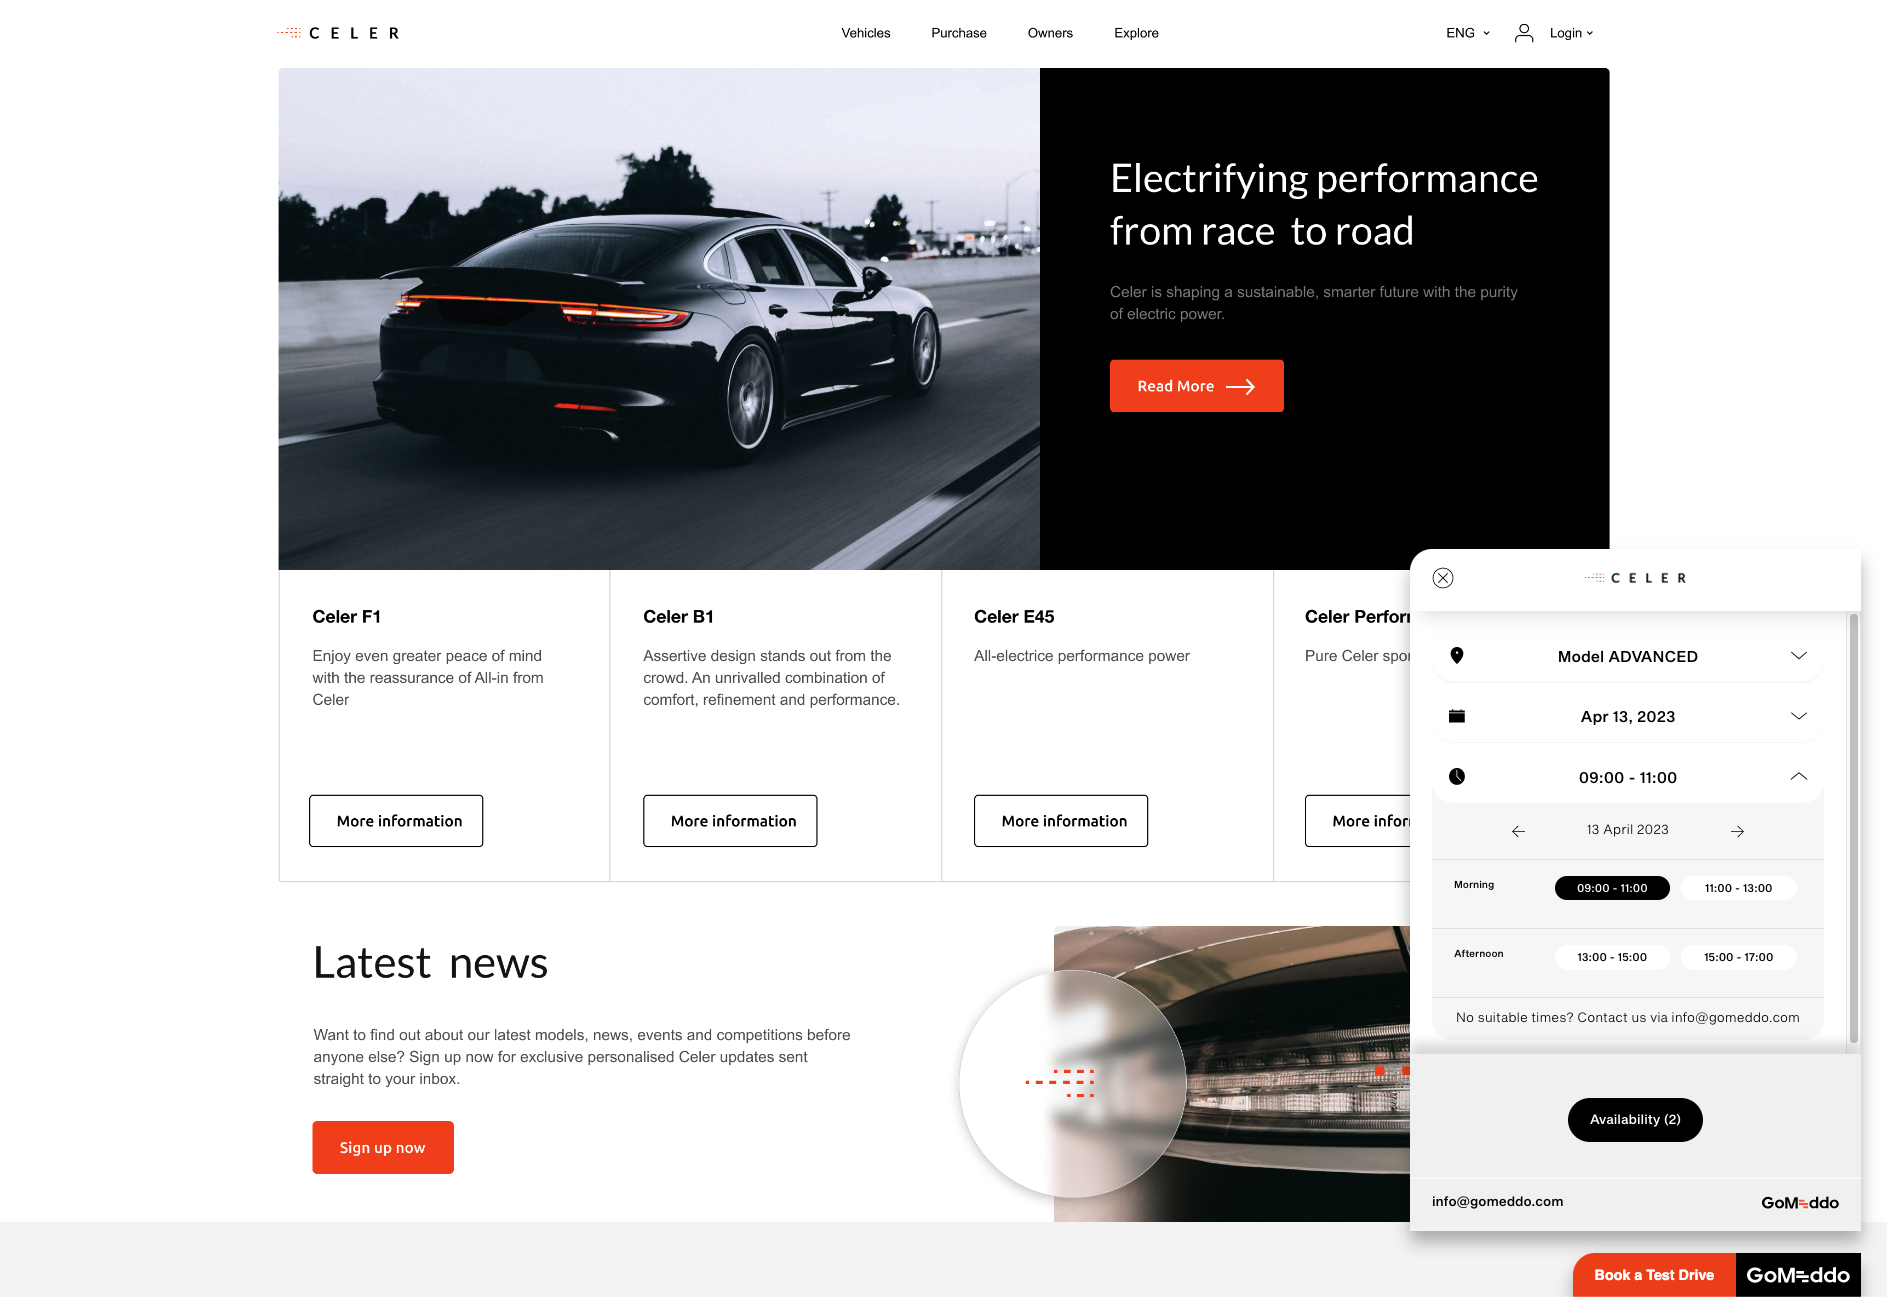
The GoMeddo Widget allows your customers a self-service booking process right on your home page. The Widget can be easily implemented on your website and will support customisations to brand the Widget accordingly.
Pre-requisites
-
Install GoMeddo
-
Install GoMeddo Landing Page Extension latest version
The following links will take you directly to the installation page in Salesforce:
Important! Make sure to always install “For Admins Only”.
If you are upgrading GoMeddo from v4.60 or below you need to follow these additional steps: Upgrading GoMeddo < v4.60 to support the widget
Version 1.15 of the GoMeddo Landing Page extension introduced a conversion to second generation packaging. To properly upgrade to 1.15, you must first upgrade to the first generation package version of 1.15 using one of the below links:
After you have successfully upgraded using one of these links, perform a second upgrade using one of the following links:
Resource setup in GoMeddo
In order to make GoMeddo Resources available to the GoMeddo Widget please follow these steps:
-
Make sure the API Visible checkbox is enabled on the Resources you want to expose to the Widget
-
Make sure all the parents of the Resource have the API Visible checkbox enabled
-
Set up Default Price and Default Price Calculation for the Resources you intend to use
-
Configure Services if needed
-
Make sure each Resource has a Timezone
-
Edit the Resource Page Layout:
-
add the Image Url, Keep in Mind and Features fields
-
-
Edit the Resources that you are exposing. Add a URL of an image to the Image url field and optionally add text to the Keep in mind and Features fields
Create API Integration user
Create an API Only user, which has the following:
-
GoMeddo license (only required on Production orgs, you can skip this step on Sandbox orgs)
-
A Profile or Permission Set with Read and Create on Lead and/or Contact & Account, depending on the required functionality
-
GoMeddo Admin Permission Set
-
GoMeddo Widget & Integration Permission Set (previously B25 Landing Page)
-
Custom Permission Set with under System Permissions:
-
API Enabled
-
API Only User (only available in Enterprise Edition)
-
Password Never Expires
-
-
Make sure to assign a licence to this user (this depends on the environment type).
First time setup
-
Go to welcome.GoMeddo.com
-
Fill in a name that you will remember
-
If you already have a Widget configuration, you can access it via https://welcome.GoMeddo.com/business/<yourwidgetname>/configure/settings/
-
-
Log in with the API User you created
-
Click Allow
-
Press Create new App in the bottom left corner